
With the come of spring, new OS versions and more knowledge about Linux, I think time has come to make another tutorial about how to setup a small hosting server, mainly for personal usage.
Virtualmin has been the best open source solution for a hosting panel. I have tried many before and in my opinion it's even better than cPanel - compared as a solution for simpler needs.
I have previously used ubuntu as a server solution and it completed the job in an honorable manner. Together with a new LTS release and the abundance of tutorials, it still makes one of the best choices out there. In fact, it is so good that mainly curiosity pushed me towards trying debian, especially since they are quite similar in the end.
Prerequisites and conventions
I will be using a digitalocean vps with Debian 10. I will be doing most of what digitalocean recommends for setting up a new debian server:
https://www.digitalocean.com/community/tutorials/initial-server-setup-with-debian-10
We will asume the following:
- the sudo user will be
sudouser; - the address of the server is
example.com.
Initial server setup
As a starting point, I will use an older article related to how to setup a virtualmin hosting server:
https://draghici.net/2018/09/15/virtualmin-hosting-on-ubuntu-16-04-x64/
A sudo user
adduser sudouserusermod -aG sudo sudouserpasswd -l rootsu - sudouser
Setup the locales
sudo nano /etc/default/locale- add the following, should you want
en_US.UTF-8:
LANG=en_US.UTF-8
LANGUAGE=en_US.UTF-8
LC_ALL=en_US.UTF-8
LC_TYPE=en_US.UTF-8
sudo locale-gen
Enable swap
Simplified its role, the swap space uses disk memory as RAM when there is no more RAM available on your system. There is much to talk about on the subject. For getting started, we can conclude the it is generally useful and we can use the following commands to enable it:
sudo swapon --showsudo fallocate -l 4G /swapfile- creates a 4GB swap filels -lh /swapfilesudo chmod 600 /swapfilels -lh /swapfilesudo mkswap /swapfilesudo swapon /swapfilesudo swapon --showsudo nano /etc/fstaband append:/swapfile none swap sw 0 0
More about swap and swappiness:
- https://opensource.com/article/18/9/swap-space-linux-systems
- https://www.howtogeek.com/449691/what-is-swapiness-on-linux-and-how-to-change-it/
Changing the swap size
After setting the swap for my system in the way described above, I this error: Not enough swap space for hibernation. So, the following series of commands helped:
sudo swapoff -a- turn off all swapsudo rm /swapfile- this step is if you want to delete the current filesudo dd if=/dev/zero of=/swapfile bs=1M count=8192- makes a 8GB filesudo chmod 600 /swapfile- set permission to root only if you made a new filesudo mkswap /swapfile- converts file to swap formatsudo swapon /swapfile- enable swap on the file.
Sources:
- https://itsfoss.com/swap-size/
- https://askubuntu.com/questions/1009404/how-to-expand-existing-swap-file
Git
sudo apt-get update && sudo apt-get upgrade -ysudo apt install git
Sqlite
sudo apt-get update && sudo apt-get upgrade -ysudo apt-get install sqlite3 libsqlite3-dev -y
zsh
I like nice things. This is why I still prefer MacOS to Linux, though UbuntuDDE seems like a very-very interesting project.
Of course, there are some other shells out there which people say are better. But I am of those guys who often stick to a solution they now works. And if curiosity "enforces" change, then I will try to change one thing at a time. I am now changing the operating system, but I am keeping the shell.
sudo apt-get update && sudo apt-get upgrade -ysudo apt install zsh -y
Setting up zsh for users
The first time you run zsh for a user, you need to select how to configure it. The recommendation is for:
(1) Continue to the main menu.(0) Exit, creating a blank ~/.zshrc file.
You can use it in combination with antigen, which is a plugin manager for zsh:
mkdir ~/.antigen/ && cd ~/.antigencurl -L git.io/antigen > antigen.zsh
(Remember the3rdrule about preserving debian)nano ~/.zshrcand load antigen, together with your configuration
An example configuration is:
source ~/.antigen/antigen.zsh

antigen use oh-my-zsh

antigen bundle git
antigen bundle heroku
antigen bundle pip
antigen bundle lein
antigen bundle command-not-found

antigen bundle zsh-users/zsh-syntax-highlighting
antigen bundle zsh-users/zsh-autosuggestions

antigen theme bira

antigen apply
To update the default shell for a user, you can do the following:
sudo nano /etc/passwd- replace
/bin/bashwith/bin/zshfor whichever user you want to use this shell as default.
Enable the firewall
sudo apt-get update && sudo apt-get upgrade -ysudo apt-get install ufw -ysudo ufw allow OpenSSHsudo ufw allow in "WWW Full"sudo ufw enable
More information:
- https://www.digitalocean.com/community/tutorials/how-to-setup-a-firewall-with-ufw-on-an-ubuntu-and-debian-cloud-server
- https://draghici.net/2018/03/03/setting-new-droplet-digitalocean-webmin-lamp-ssl/
Commands which might be useful
uptime- show the system uptime;uname --help- useful information about your sytem;killall -9 <process name>- kill a process;speedtest- I guess it's obvious what it does and you install it withsudo apt install speedtest-cli -y
Configure the hosting solution
Virtualmin
First of all, run the following commands to install virtualmin on your system:
sudo apt-get update && sudo apt-get upgrade -ywget http://software.virtualmin.com/gpl/scripts/install.shsudo /bin/sh ./install.sh --minimal --force
First login
Once the setup has finished, you will be prompted to login to the web administration panel, found at: https://example.com:10000. You can login with previously created your sudo user and password.
You will have to complete a setup, where you can comfortably keep the defaults.
Once the setup is completed, I recommend disabling the email.
If you use Google Chrome or any flavour of it - e.g. brave, chromium - you might encounter this NET::ERR_CERT_INVALID warning.
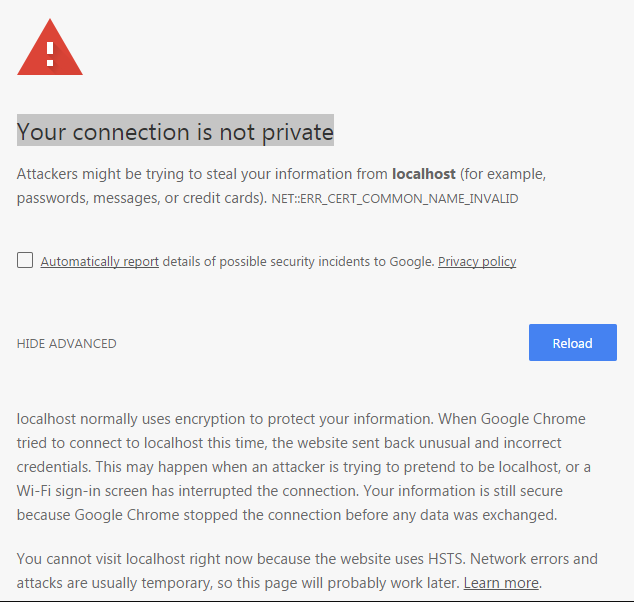
Whenever you see this error, you should just type badidea or thisisunsafe. There will be no indicator of your typing, but once you are done, the proceed button will be unlocked.
Source:
https://medium.com/@dblazeski/chrome-bypass-net-err-cert-invalid-for-development-daefae43eb12
Change the port
It is important to change the default server from 10000 to something else. For this, you need to go to the Webmin tab, Webmin > Webmin Configuration > Ports and Addresses. There you should replace 10000 with your desired port.
https://www.youtube.com/watch?v=uO9qXYLF4GU
Once you have changed the port, remember to add it to the allowed firewall ports. Should your port be 99999, the command is:
sudo ufw allow 99999/udp
Setup backups
You should always have backups for your server - this will save a lot of headaches in case you get hacked, you accidentally delete something and other uncomfortable situations. Should your server be small, you can use the free tier or Amazon S3.
https://draghici.net/2018/11/04/backup-webmin-virtualmin-servers-on-amazon-s3/
Setup the first server
I usually add a website for the address of the virtualmin, on port 80 for having virtualmin handle the SSL certificate automatically.
Should you encounter Failed to change address : IPv6 cannot be enabled unless the Socket6 Perl module is installed you need to install the following package:
apt-get install libsocket6-perl -y
Set the time
Just to have the time accurate on your system, you should check the settings and maybe choose and set a syncing option. To do that, in your Virtualmin sidebar you should go to Webmin > Hardware > System Time. An example value for synchronizing time is: europe.pool.ntp.org
Read more: https://timetoolsltd.com/information/public-ntp-server/
Multiple PHP versions
You should get updated versions of the software and be as much up to date as possible with your packages. However, when the software you use might require older php versions, it's recommended to use that only in the virtual server you setup. This can be done with the following commands:
sudo apt-get -y install apt-transport-https lsb-release ca-certificates curlwget -q https://packages.sury.org/php/apt.gpg -O- | sudo apt-key add -echo "deb https://packages.sury.org/php/ buster main" | sudo tee /etc/apt/sources.list.d/php.listsudo apt-get update && sudo apt-get upgrade -y
After this, you should be able to install different php versions. E.g. to install php 7.0 you can use:
sudo apt install php7.0 php7.0-fpm -y
Sources:
- https://tecadmin.net/install-multiple-php-version-with-apache-on-debian/
- https://blog.magepsycho.com/how-to-install-multiple-versions-of-php-on-ubuntu/
- https://draghici.net/2020/01/05/virtualmin-on-ubuntu-add-support-for-newer-php-versions/
- https://askubuntu.com/questions/601/the-following-packages-have-been-kept-back-why-and-how-do-i-solve-it
nvm
sudo apt-get install build-essential libssl-dev -ysudo nano /etc/profile.d/nvm.shand add:
#!/bin/bash
if [ ! -f ~/.nvm/nvm.sh ]; then
# May need to be updated with the latest nvm release
wget -qO- https://raw.githubusercontent.com/creationix/nvm/v0.33.11/install.sh | bash
fi
source ~/.nvm/nvm.sh
sudo chmod +x /etc/profile.d/nvm.sh- For each of the users who will run it do:
source /etc/profile.d/nvm.sh
composer
sudo apt-get update && sudo apt-get upgrade -ycurl -sS https://getcomposer.org/installer -o composer-setup.phpsudo php composer-setup.php --install-dir=/usr/local/bin --filename=composer
wp-cli
curl -O https://raw.githubusercontent.com/wp-cli/builds/gh-pages/phar/wp-cli.pharchmod +x wp-cli.pharsudo mv wp-cli.phar /usr/local/bin/wp-cli
Moving virtual hosts
You might be migrating from a different install or host to this one. For example, I am migrating most of the websites I want to host from an Ubuntu based server which is still online. Handling DNS together with testing is tricky, because the updates do not happen instantly.
However, there is a "hack" you can use - the hosts file on your own computer. More information about how to edit it you can find here:
https://support.rackspace.com/how-to/modify-your-hosts-file/
So, using this you can easily switch between the possible destinations of a domain name.