Recently - rather recently, as it has been happening around me for a few years now 🙂 - I have felt the benefits of automating repetitive tasks, build processes, using CI/CD pipelines.
Even if not necessarily in my field of expertise, I started to look around on how it works, learnt more and more and finally decided to get my hands dirty.
There are a lot of tools out there which are related to this subject, among which I will randomly mention:
- https://drone.io/
- https://concourse-ci.org/
- https://www.spinnaker.io/
- https://rancher.com/rancher-os/
- https://www.docker.com/
However, due to its popularity and for starting on a secure path - as a first step, at least - I chose a (simple) Jenkins approach:
- https://jenkins.io/
- https://www.youtube.com/watch?v=qE3tfS7k1VI
For the current implementation, we will mainly use the steps described in the first sources link mentioned at the end of this article.
What to do next..
Setup Jenkins
First of all, you should setup a new Jenkins instance (some help is available here) on your VPS provider (I use DigitalOcean). For starters, I went for the cheapest droplet available (approximate summary: 5$/mo, 1GB/1CPU/25GB/1TB) and used an Ubuntu 18.04 x64.
The .bash_historysample:
sudo apt-get update
adduser admin
usermod -aG sudo admin
sudo passwd -l root
su - admin

locale sudo apt-get install language-pack-en-base
sudo nano /etc/default/locale
# edit content as instructed in the source tutorial
sudo dpkg-reconfigure locales
sudo swapon --show
sudo fallocate -l 4G /swapfile
ls -lh /swapfile
sudo chmod 600 /swapfile
ls -lh /swapfile
sudo mkswap /swapfile
sudo swapon /swapfile
sudo swapon --show
sudo nano /etc/fstab
sudo ufw allow 8080
sudo ufw allow OpenSSH
sudo ufw enable
sudo add-apt-repository ppa:webupd8team/java
sudo apt install oracle-java8-installer
wget -q -O - https://pkg.jenkins.io/debian-stable/jenkins.io.key | sudo apt-key add -
sudo apt-add-repository "deb https://pkg.jenkins.io/debian-stable binary/"
sudo apt install jenkins
sudo systemctl start jenkins
sudo systemctl status jenkins
sudo nano /var/lib/jenkins/secrets/initialAdminPassword
# or a different command to view the content
sudo apt-get update
sudo apt-get install nginx
sudo ufw allow 'Nginx HTTP'
sudo add-apt-repository ppa:certbot/certbot
sudo apt-get update
sudo apt-get install python-certbot-nginx
sudo nano /etc/nginx/sites-available/default
# edit content as instructed in the source tutorial
sudo nginx -t
sudo systemctl reload nginx
sudo ufw allow 'Nginx Full'
sudo ufw delete allow 'Nginx HTTP'
sudo certbot --nginx -d jenkins.example.com
sudo nano /etc/nginx/sites-available/default
# edit content as instructed in the source tutorial
sudo nano /etc/default/jenkins
# edit content as instructed in the source tutorial
sudo systemctl restart jenkins
sudo nano /etc/nginx/sites-available/default
# edit content as instructed in the source tutorial
sudo systemctl restart nginx
sudo systemctl restart jenkins
Code language: PHP (php)
For the following steps, it is necessary to know how to add plugins. This is done by:
- Logging into Jenkins;
- Accessing:
Dashboard > Manage Jenkins > Manage Plugins.
Even if not necessary, I added the Blueocean set of plugins and Simple theme. For the better look desired, I have used jenkins-neo-theme.
The next step is to add the Digitalocean plugin. This requires the setup of an API key and a SSH key pair.
Setup a SSH key pair on DigitalOcean
- Login to your Jenkins master server and type:
cat ~/.ssh/id_rsa.pub - To generate a new key:
ssh-keygen -t rsa- It is important to generate a key without a passphrase (for some reason);
ssh-keygen -m PEM -t rsagenerates the format necessary;
- Go to
DigitalOcean > Dashboard > Security; - Create a new SSH key with the information belonging to your server.
Creating an API key on DigitalOcean
- Go to
Dashboard > API > Tokens/Keys; - Press
Generate a new token; - Make sure you save the token information, as the success message informs.
Connect Jenkins with DigitalOcean
- Go to
Jenkins > Dashboard > Manage Jenkins > Configure System; - Use the previously generated API key and get the SSH private key set for the Jenkins Master (previously generated with the
ssh-keygencommand);
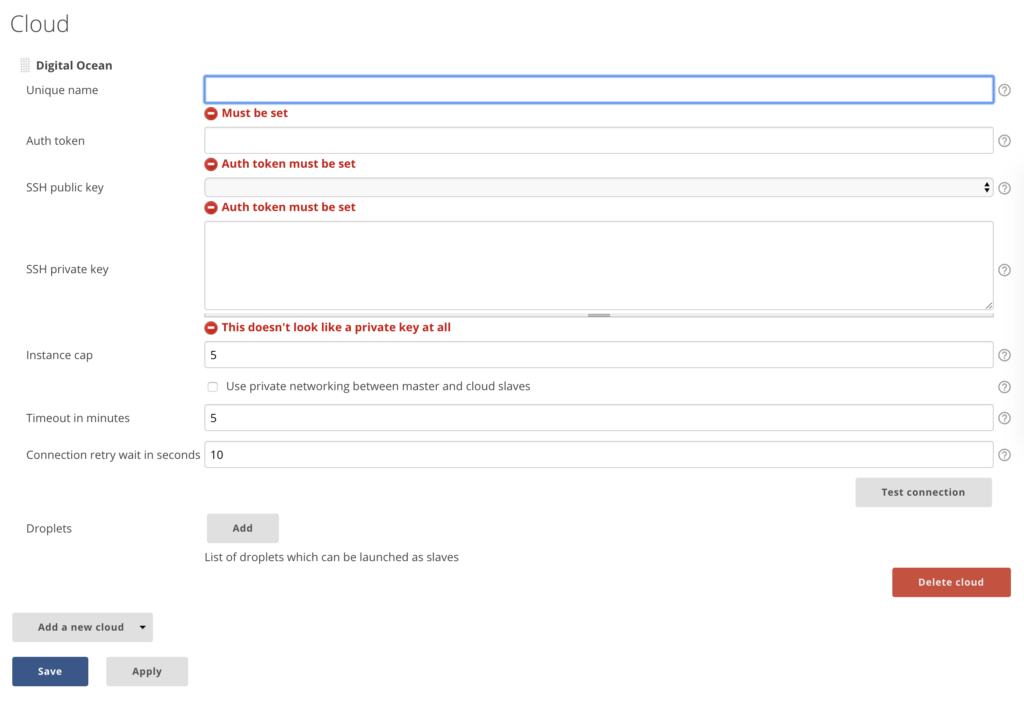
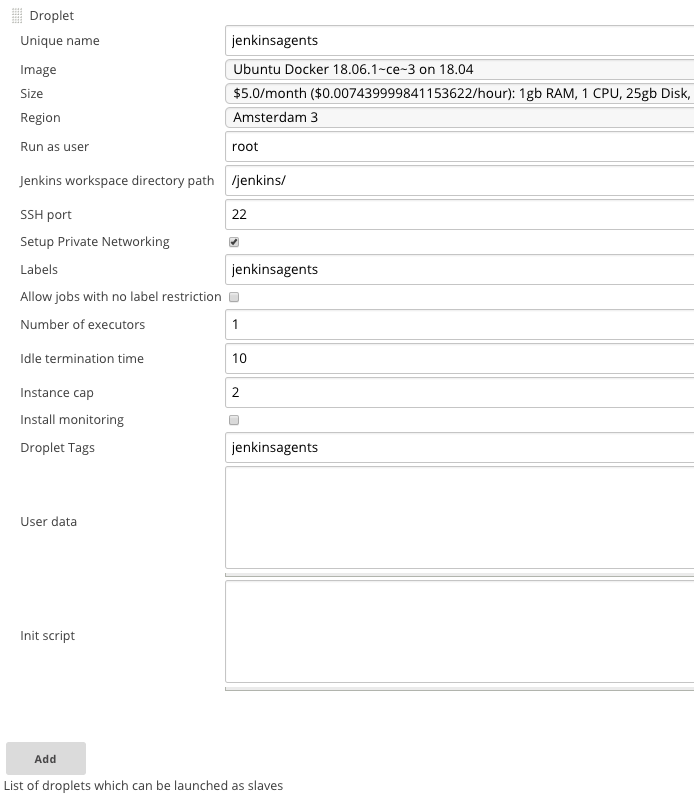
Register a droplet pool for projects
- Go to
Jenkins > Dashboard > Manage Jenkins > Configure System; - Go to
Cloudand pressAdd; - Make sure you add a label for your droplet pool;
- This can later be divided in two categories:
-
builders- which are responsible for creating artefacts, publishing code, merging code etc.; the droplets will be destroyed soon after the task is completed; demos- the projects will be built in droplets with a longer lifespan; this way manual testing will be possible.
-
CloudBees Docker Custom Build Environment
- Log into Jenkins;
- Access:
Dashboard > Manage Jenkins > Manage Plugins - Install CloudBees Docker Custom Build Environment Plugin
This plugin is necessary in order to be able to define a custom Dockerfile for your build. In every project, the docker configuration file should be in ./docker/Dockerfile.
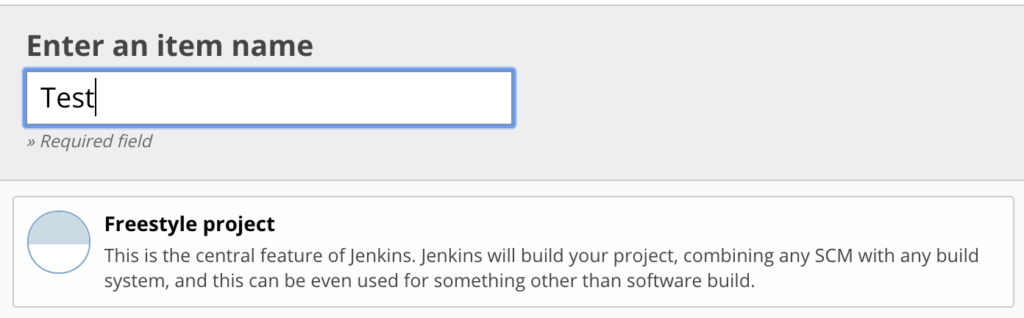
Test build
- Log into Jenkins;
- Access:
Dashboard > New item; - Git the project a name and select
Freestyle project; - On the next page select
Execute shellfrom theBuildsection; - In the textarea opened add:
echo "This is a test"; - On the next page click
Build now;
If the above steps don't work, my suggestion is to start investigating by searching the jenkins general log, which you can access with the url: https://<jenkins-url>/log/all
Still unclear..
- What if concourse could be used in a container and you could run almost all of your CI/CD stuff locally? This is a wrong approach, it is dirty and possibly useles.. but.. is it possible?
- Is it ok and efficient to use
docker-composeto manage jenkins masters and slaves and whatever else is necessary? What if we did this for something else than jenkins? What if this were a different label?
Next..
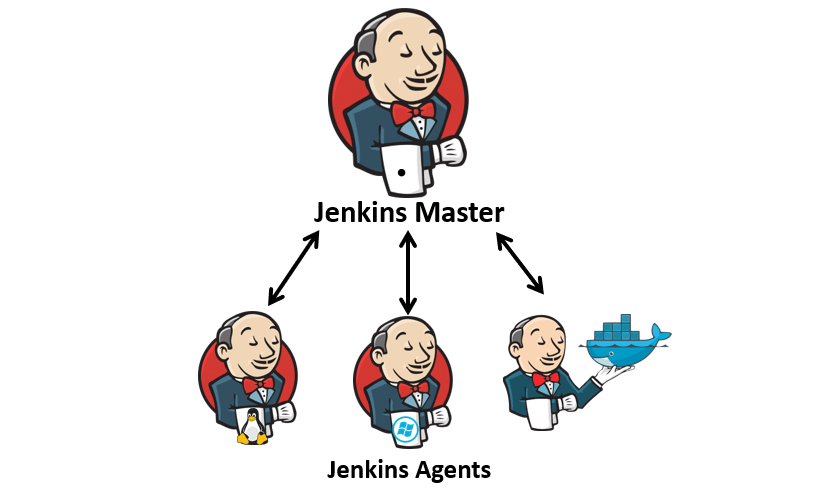
At this point, Jenkins should be ready to build using the slaves/agents created automatically on DigitalOcean for each job.
But also at this point, there is no project to build. So.. I am thinking I would like to do some updates for an older project of mine: wp-just-an-admin-button.
Expectations at this point
- create CD env whenever a branch is merged into
masterwhich will show a new WordPress installation with the new code of the plugin available; - if everything is ok, release the new version to WordPress plugin repository.
Related articles
- https://draghici.net/2019/01/06/taking-the-development-of-a-github-hosted-wordpress-plugin-from-old-to-automatic/
- https://draghici.net/2018/07/23/setting-up-jenkins-on-ubuntu-dedicated-server/
Sources
- https://nemerosa.ghost.io/2016/05/05/saving-money-with-jenkins-digital-ocean-and-docker/
- https://www.digitalocean.com/docs/api/
- https://www.digitalocean.com/community/tutorials/how-to-set-up-ssh-keys--2
- https://www.build-business-websites.co.uk/how-to-install-jenkins-2-on-ubuntu/
- https://blog.codecentric.de/en/2018/02/continuous-integration-drone-aws/
- https://www.youtube.com/watch?v=PggaKQ9QNbw
- https://stackoverflow.com/questions/31044704/this-node-is-offline-because-jenkins-failed-to-launch-the-slave-agent-on-it